Showing posts with label home decor. Show all posts

24 January 2012

Valentine's Decorations


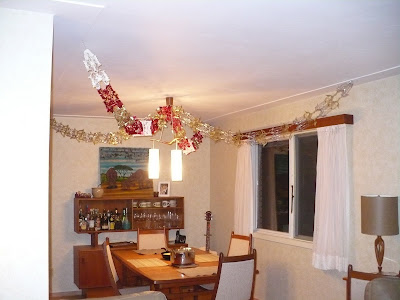
I enjoyed the Christmas decorations so much this year that I was starting to feel sad about taking them down way back in December. So even before Christmas I was planning some nice Valentine's decorations and even ordering supplies. And I love them.


This banner I made with some paper hearts that I ordered off Etsy. It was inspired by a million similar ones I've seen around the internet. I especially love this as I think it's quite classy. And the little hearts are so small and delicate that they move ever so slightly when the heating is going. I just sewed through the hearts on the sewing machine - the trickiest part was holding two hearts together while I sewed, next time I try something like this it will be with something double sided.


I also ordered these vintage valentines off Etsy just for fun. I picked animal ones - Kevin enjoys the puns and Henry enjoys pointing at the animals.


To hang from the chandelier I sewed up these hearts from some pink and red fabric that I love but is too nasty and synthetic feeling to use for anything else. I like the think this one was all my idea.


And I have dreams of doing valentines crafts with Henry one day. I don't know if these count as he didn't know what he was doing. But I cut these hearts out of some cardstock that Henry painted and coloured on and then just taped them to some strings. To get the heart shaped I used the cutting machine at the Early Years Centre where I take Henry to play and it is really fun - lots of possibilities!


I love my decorated living and dining room and I love making new traditions and rituals. Especially colourful ones in this particularly dreary winter we are having.


08 November 2011

New Duvet Cover


I had a bit of sewing time last week while Henry played with his trains in the rec room (which is also my current sewing studio). So I finally got around to this simple project.
I had acquired a few queen flat sheets before I decided that I did not like using flat sheets - I only like using a duvet with just a duvet cover. So these weren't getting used. And Kevin and I both LOVE this cactus sheet. We also have the cactus fitted sheet but even with our never-made bed you don't get to see fitted sheets enough.
I just laid a duvet cover over the sheets and cut them to size, then sewed them together on three sides. The backside is another yellow flat sheet. And the bottom is held closed with buttons. Now I can retire our old pilly duvet cover and we'll still have 2 really nice ones to keep. (You can see a bit of our other really nice duvet cover in the last picture of my last post.) And we get maximum enjoyment out of those awesome cacti!
I should also mention our artwork above the bed. I made that a few months ago. I found the yellow tablecloth with brown and orange embroidery at a thrift store. Then I used my table saw to turn a 2x4 into a frame and stapled the tablecloth to it. I do love our yellow bedroom.

26 May 2011

The Dining Room Chairs

I finally finished recovering our dining room chairs. I had the idea way back in February. And then I did one and I thought it was kind of a hack that may be a bit lacking in the durability department (it involved a glue gun) so I wanted to see how it held up. Well months later that first one is holding up and the rest are done. Recovering the seat of chairs is easy peasy but doing those backs was tricky. I didn't want to remove the old wood plugs and in the end I didn't have to. I love having crazy fun chairs instead of grubby white-ish ones.


And here are a few pictures of Henry from today. Actually a bunch of pictures, he seems to be extra cute today.

11 February 2011

Operation Add Colour


I made 2 steps toward de-beige-ing the living area this week. I replaced our beige shears in the dining room with some very colourful curtains. I bought the fabric from our thrift store for $1 (guess they thought that colourful pattern would not be popular) and couldn't believe when I got it home and it was just enough to make curtains with.


I just made them as simply as possible: a rectangle with hemmed edges and those sharp pokey curtain rings inserted into the hem.


The hardest part was just deciding on fabric. Even once I had this fabric that I loved I had to decide if it was the one to be curtains. It's not like making a skirt because you can have lots of skirts but only one pair of dining room curtains. And when you sew and you can choose any material out there the possibilities are just overwhelming. But I finally managed to decide that this material was the one and got the curtains done.


Next was to cover up the brown cardboard lampshade with something a bit nicer. When I said colour I wasn't actually thinking fluorescent colour but I just love something about this fabric. And I figured it's so easy to change a lampshade I might as well go crazy. This was another thrift store find from my stash.

I just used spray adhesive all over the drum and gluegun to stick the edges on the inside.

Next step is the big one: recovering the dining room chairs. Try as I might I have given up on finding 3 1/2 yards of the perfect fabric in home decor weight at a thrift store so I'm going to have to spend a bit of money. I think I have decided on the fabric, just have to go for it now.

And here are some pictures of the cutie, in a pretty colourful sweatshirt too:

06 January 2011

Trivet


Today I finally finished the giant trivet that I started working on back before the holidays. We have a beautiful teak dining table so we are always careful not to put hot (or even warm!) things directly on it. So it's usually a mess of mismatch trivets. So I wanted to make one trivet big enough to hold all (or almost all) the hot pots for one meal. So I made this:


You can tell I'm quite pleased with how it turned out because I've included 4 pictures of one simple trivet. I got the idea from Ken Burton's Table Saw Book but made it larger to fulfill my vision. I chose 9" x 24". And like always I just used some scrap 2 x 4 s and my table saw. Then stained and varnished it so I think it looks like a quite nice trivet rather than a hunk of structural lumber on the dining table.

And here it is in action, we had fajitas for dinner tonight and it held all 3 of our hot dishes. Perfect!

24 June 2010

Blanket Bin Version 2


I really liked Blanket version 1 but it was too huge and I knew how to make it better. So I quickly made version 2. I only started it yesterday, it was super quick to make. I like this fabric even better. And I used another fabric to line the inside to make it nicer.
The next version will have a lid and will also be a bench - I am excited about that.

17 June 2010

Blanket Bin

I finished a project this morning. A big blanket bin for the living room. I wanted something to hold our 2 snuggling blankets and the big nursing pillow and our little basket was always overflowing and falling over and a big mess. So I made this. I wanted to make sure it was big enough so I obviously made it way too big. But overall I like it.

I used 2x4s to make a frame with a thin plywood bottom. I was able to use scraps other than the plywood so this part cost almost nothing.


And I covered it with this bedsheet with this awesome pattern that I got from our thrift store for 50 cents.


And here it is in its spot. A little huge but it serves its purpose. And I do like how it looks.

25 May 2010

Floor Cushion


I just finished this floor cushion I've been working on. It will be for when Henry's older and he can drag it around the house by the handle and read his favourite books while sitting on it just like the little girl here:
http://3punkmom.blogspot.com/2010/05/tutorial-land-of-nod-inspired-floor.html

And I made it out of some fabric from a thrift store $1 surprise bag and stuffing from an old weird cushion I wanted rid of so it only cost a few $ for piping. I was excited to make it to try using piping. I feel like it looks so professional with piping - what else can I add it to?

12 January 2010

Frames

There's so much I can do now I have a table saw! I made these in December and Kevin and I just got round to finding the perfect stain and finishing them. I made these frames out of regular 2x4s. They are simple and cost nothing. I just used the table saw and the router (didn't realize all the opportunities a router would open up either). The total cost for the three including stain was less than $15.


01 December 2009

Christmas Decorations


We just finished putting up our Christmas decorations. We drank some nice hot apple cider while we did it and listened to Christmas music.


My brand new nativity set:

Decoration made from some of our artist friend's cards from over the years: