Showing posts with label knitting. Show all posts

12 February 2012

For Baby


I knit up some baby booties for the new baby recently. None of the booties I knit for Henry before he was born ended up fitting - he had long skinny feet at birth. But I think this is a better pattern. It is Bernat's free pattern for baby booties and the same one that Soulemama uses - so it must be good.
I used cotton yarn since the baby is not due till May 11 when it could be quite warm already. And the yellow pair should be a tad smaller than the green since I went down a needle size but I can't see a difference.
Something about these little booties was so fun to knit that once the yellow ones were done I immediately started the green. But now I've moved on to a little sweater - so fun to knit for the little baby inside my tummy.
I showed Henry the little boots and told them they were for the baby in Mommy's tummy. But he disagreed and said they were his. And then tried unsuccessfully to put them on. I've bought the baby a few clothes with cars or animals and even Sesame Street characters on them thinking Henry will love to point at the baby's fun clothes but now I see that it could turn out a different way.

30 January 2012

Knit Toddler Vest


I finished this vest for Henry yesterday. I used this pattern from Vanessa at A Little Original but I got a bit mixed up at the top so mine doesn't sit quite as nicely. And I used some super bulky thick and thin yarn I got from the thrift store in the fall.

I forgot how sweet he looks in a vest and collared shirt, I used to dress him like that a lot last winter. I couldn't get a really good picture of him so instead I am putting up 5 not so good pictures.

13 November 2011

Yellow Hat #3

This is the third yellow hat in Henry's collection now as I have been trying to replace his old too small one. Luckily he doesn't hate this one like the last one, in fact he puts up little to no fuss about wearing it. And I made it nice and long to cover his little ears and his whole big forehead. I used the same pattern as back in August when I made that other hat that Henry hates but did ribbing at the bottom instead of rolling.
We had a little bit of snow on Friday that you can see in the above picture. Henry wasn't too excited about it though, he just called it rain. Maybe he'll be more impressed when it stays on the ground.

03 November 2011

His and Hers Hats


Kevin and I have been wearing our his and hers matching grey hats recently. Whenever I have asked Kevin about knitting a hat for him he has always said "no thanks I already have a hat." What a boring practical thing to say. But at the end of last winter he lost his hat! So finally I got to knit him a hat. They are actually from different yarn. Mine is quite a bit thicker than Kevin's - he specifically requested a thin yarn. And I didn't purposely make them matching. When it came to make Kevin's that was the only colour I could find that I thought he'd like.
Henry's also wearing a hat I knit. His yellow hat is currently the only hat he will wear. I think it was about the second thing I ever knit if you don't count the many garter stitch bookmarks I knit as a kid. It is also too small for him, doesn't cover his little ears enough. I am working on knitting him another yellow hat but who knows if he will like it.

Here are some more pictures from Sunday. It was a nice day so we went to the big park in Uptown Waterloo and had a great time. Henry is really into running down hills these days and there were lots of hills for him there.

27 September 2011

A Sweater for Henry


I've been working on this sweater for Henry for about a month on and off and now it's finally ready. I used this 7-hour toddler sweater pattern but made it all in garter stitch just for something a bit interesting. I wasn't sure if I liked the garter stitch until I added the pockets - with the pockets it didn't look like such a blob. It's made from a thrift store pure wool that's a bit scratchy so I'm glad it turned out just big enough that it can be worn as more of a jacket over other sweaters, keeping that scratchy wool away from his skin.

And the most fun part was that I made the buttons! I made them from a stick I found in the backyard. I just put the stick in the vice, used a handsaw to slice small sections and then held the little buttons with my hand while drilling two holes for the thread. Then I did some minimal sanding. This was something I'd been meaning to try for ages and I'm so glad I did. Even though I thought it would be easy it was even easier than I had thought. I definitely want to do this again, am thinking I should gather some sticks for this purpose before winter comes.

23 August 2011

A knitted hat

I have just completed the first knitted hat of the season. I thought I'd do one for Henry a bit early so that I could take it on our camping trip that starts on Thursday. The nights are already cool here and we are going a bit further North too.
I just did this simple pattern for a toddler toque and just added some I-cord straps to tie it on with. He hated having it on, these were the best pictures I could get.

10 May 2011

A Spring Sweater


I finished this sweater for Henry a few weeks ago but then it sat waiting for the neck hole to be made a bit smaller for those weeks. It's this pattern that I've made before but this time with size 7 needles. It turned out well except for the crazy wide sleeves (can't believe I didn't notice how huge they were as I was knitting). It's a cotton yarn so he should be able to wear it in the months coming up.

17 January 2011

Henry's Peace Vest

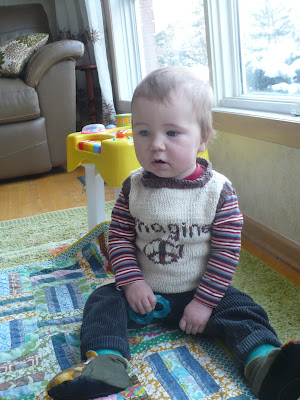
I just finished knitting this little vest last night during our Sunday night cartoons. And I love it. So sweet especially with a stripey top underneath. It is from this pattern here.


I did the 12 month size which gives the skinny guy some growing room. I used a cotton so he can hopefully wear it in the summer too. I love the pattern. It was my first time doing any colourwork, a perfect first project for that. I had to do a sewn cast off for the neck hole. When I did regular binding off I could not get it over his big head, not even close.


I think he is so sweet in it. Taking these pictures this morning reminded me of back when he would sit still, back when he couldn't squirm out of the perfect position. Well there is no need to plan for action shots when 11 month old Henry is involved.


I still think he is very photogenic, see the evidence below.

12 January 2011

Knitting Bag the Next Generation, A Snowy Day Project

It is snowing and snowing here today. I actually had planned to leave the house today but the plans quickly changed when it snowed all morning.

So Henry and I both put on some cozy clothes to spend the day indoors. I spent the morning sewing up this new, improved knitting bag. The main improvement over the old one is it stands up by itself like a knitting basket while in the house. I made it the same way I made these toy buckets which were based off these from Homemade by Jill. And then when I want to do some knitting on the go I can just grab it by the handles and off I go, nothing to transfer. It turned out a bit bigger and sloppier than I had planned and I don't know why I thought it would look kind of cool that the two fabrics don't match. But oh well, maybe there is a third generation of knitting bags in my future.


Ready to go:
Here is the inside, I tried a zipper pocket for the first time which turned out to be pretty easy.
And just to show that I don't spend more time making knitting bags than actually knitting, here is a picture of me in my new winter headband that I just finished. I used this pattern.
And here is what I did all afternoon, once the sewing bag was done. Sat next to it and knit.

And played with Henry too of course.


03 January 2011

A Case for my Knitting Needles: A Tutorial

I made myself a roll up case for my knitting needles. I can see which sizes I have and find them easily. And I got to use some fun fabrics that are a bit loud for anything else I might usually want to sew. And I even put spaces for removable/interchangeable labels to mark the sizes. There are already a few tutorials for knitting needle cases out there on the internet but I thought I'd add mine. And I think the label bit might be a new idea and is definitely a good idea, if I may say so myself.


I chose to make 16 pockets and each pocket 1 and 1/2 inches wide which worked out well.

First gather the materials, fabric that's a bit stiff like home decorating fabric:
outer fabric: 16" x 26"
inner main fabric: 16" x 26"
pocket fabric: 13" x 26"
clear plastic (you know that thick stuff from packaging for duvet, changing pad etc): 1 1/2" x 26"
ribbon for tie: 2 pieces about 15" each
elastic: 26"


Iron the pocket material in half. I also used the iron on a low setting to get rid of wrinkles in the clear plastic. I carefully passed the plastic under some fabric with the iron on top.


Now take the strip of plastic and sew it onto the pocket material about an inch down from the folded top. Just sew one line along the bottom. To keep the plastic in place without putting holes in it use some tape.


Place the pocket material on top of the inside fabric and pin in place. Line up the elastic where you want it, about 3 inches down from the top of the inside fabric. Pin the elastic in place.

Next step is to sew up segments to make the individual pockets. Take a ruler and draw lines using chalk or disappearing ink all along the length of the case 1 and 1/2 inches apart. Be sure to leave at least a half inch space on each side of the case. Draw lines on the pocket material and on the elastic. And then sew it up, pockets and elastic. Be sure to go back and forth on the elastic several times since it is such a short bit to sew.


Now it looks like this:


Now flip it over and on top of the outside fabric RIGHT SIDES TOGETHER. Put the ribbons on the side (same side). Pin and sew around leaving about a 6 inch opening for turning. /you want to have some space after the pocket on each side (for turning and top stitching).


Clip corners:

And turn right side out so you have this:

And then top stitch so you have this: the completed knitting needle case.


Load it up with your knitting needles and cut paper labels (a thick paper works best for slipping into the pockets).